Pages

Showing posts with label garbage. Show all posts

Saturday, 7 July 2012

Surplus cutlery organization...

So I am still in the organizing phase of my house.  I know it is taking time but this is EVERYTHING! Of course, I take some time to create and sew in little increments.
Je suis toujours à organiser ma maison.  Ça prend du temps mais RIEN n'est épargné !  Évidemment, je pends le temps de créer et coudre des petites choses.

I decided to organize my cutlery.  Over the years, I have accumulated a lot.  I really like vibrant colours so I bought quite a few different sets.  It was too much.   So I decided it needed to slim down. Of course, I can't give it away altogether: WHAT IF I ever get 18 guests ? (Not !).  That WHAT IF is what gets me in trouble...  But first things first, I had space to STORE the surplus, but no container.  I was not about to buy anything and I had found a really interesting and clever way to make a cute container.  The site is in Portuguese but with my Spanish and limited Portuguese and the images, I was OK.  I still know how to sew !
J'ai décidé d'organiser mes ustensiles.  J'en ai trop !  J'aime vraiment les couleurs brillantes et j'en ai plusieurs ensembles.  J'ai donc décidé de couper.   Évidemment, je ne peux pas les donner.  Parce que SI j'avais 18 invités ? (euh, non !)  Ce sont ces SI, SI, SI qui me donnent des ennuis.  Mais revenons à nos moutons.  J'ai de l'espace de rangement pour le surplus mais pas de contenant.  Je ne vais pas en acheter et j'ai trouvé quelque chose d'intéressant et intelligent pour faire un joli contenant.  Le site est en portuguais mais avec mon espagnol, mon portuguais limité et les images, c'était correct.  Je sais tout de même coudre !

Here is what I found:
Voici ce que j'ai trouvé:

From this site: http://www.doluscofusco.blogspot.ca/2012/05/diy-reutilizando-garrafas-pet.html

So I got working.  I had 2 containers that were possible and could contain what I had:
Alors, j'avais deux contenants qui faisaient l'affaire:


A 2 L coke bottle, to hold the coloured cutlery and a cranberry juice bottle to hold the rest.  Of course, you need to cut the top off at the height you want.  Be careful with this step because some plastics (cranberry juice bottle) are very thick.  I used my X-acto knife.
Un bouteille de Coke de 2 L et un pot de jus de canneberges.  Évidemment, on doit couper le dessus à la hauteur désirée.  Attention avec cette étape car certains plastiques (jus de canneberges) sont très épais.  J'ai utilisé mon exacto.

After that, you need to measure the circonference of your container at the top and add a seam allowance.  Since I would be using my serger, I added 1 cm total.  Then, decide how long you want it.  For that, you need to know if you double it (like the tutorial) or just hem both ends.  I decided to hem both ends because my fabric was thick enough.
Ensuite, mesurer la circonférence du dessus et ajouter l'allocation de couture.  J'utilise ma surjeteuse alors j'ai ajouté 1 cm.  Puis, décider de la longueur du tissu.  Pour cela, il faut décider si vous le pliez en deux ou si vous faites deux bords.  J'ai décidé de faire des bords car mon tissu était assez épais.

So you sew your tube, hem both sides and create a casing for your drawstring.  Then, comes the "fun" part.  You need to sew through the plastic...  Well, if your plastic is thick, I suggest you use some kind of punch or a nail to pierce it before or you'll need a very good thimble, which for the life of me, I could not find...  I used my leather punch.  I guess you could use glue if wou wanted but I prefer to sew.  I am always suspicious about glue...  And I prefer the look of sewing.
Alors, coudre votre tube et faire une coulisse au-dessus pour votre cordon.  Et voici la partie "amusante".  Vous devez coudre au-travers du plastique...  Si votre plastique est épais, je vous conseille d'utiliser un poinçon quelconque ou un clou pour perforer les trous d'avance ou vous aurez besoin d'un bon dé à coudre, que je ne pouvais pas trouver à cet instant précis.  J'ai utilisé mon poinçon à cuir.  J'imagine qu'on pourrait utiliser de la colle mais je suis toujours méfiante de la solidité de la colle et je préfère l'aspect de la couture.

This is a leather punch.
Poinçon à cuir.
If you use a leather punch, you need to remove the pieces of plastic from the punch every time because it will jam up.  I had to melt the plastic with a flame to make it come out...
Si vous utilisez un poinçon à cuir, vous devez enlever les morceaux de plastique dans le tube du poinçon à chaque fois sinon ils vont bloquer.  J'ai dû utiliser une flamme pour les faire fondre...

So you go punching the holes.  Depending on the thread you choose, it is going to be more or less apparent so you better punch them in a straight line.  When the holes are punched, it is easy to sew the fabric down to the bottle.  This is the first yarn I found.  It is not very colour coordinated and it is curly.  I do not recommend this because it is hard to pull in the holes.  But I still like it:
Alors vous perforez vos trous.  Dépendamment du fil choisi, il paraîtra plus ou moins donc vous devriez perforez les trous sur une ligne droite.  Quand les trous sont perforés, il est facile de coudre le tissu sur le contenant.  C'est la première laine que j'ai trouvée.  Elle ne va pas très bien avec le tissu et elle est bouclée.  Je ne recommande pas ceci car elle est difficile à tirer dans les trous.  Mais j'aime quand même:


Here it is with cutlery:
Avec les ustensiles:


I think the fabric is a bit too long and so is the drawstring but they do the job.
Je crois que le tissu est trop long et le cordon aussi mais ça fonctionne.

For the second one, the plastic was easier to punch so I just used a needle but widened the holes with an awl.  You have to have a wide hole to not fray your yarn.
Pour le deuxième, le plastique était plus mince donc j'ai seulement utilisé une aiguille et agrandi les trous avec un autre type de poinçon.

This is an awl.  Very useful instrument.
Un instrument très utile.

Here is the second one, all ready to be stored in the cup board.  I did not thread the drawstring in the casing for this one.
Le deuxième avec des ustensiles, prêt pour l'armoire.  Je n'ai pas coulissé le cordon pour celui-là.


So I thought this was a fabulous project, very quick and sturdy and REUSED some GARBAGE !  Fast and CHEAP !  Just what I like !
Je pense que ce projet était fabuleux, rapide, solide et qui à RÉUTILISÉ des DÉCHETS !  Rapide et PAS CHER !  Juste comme je les aime !

Be back soon with more creations !
De retour bientôt avec d'autres créations !

Peace

Claudia

Thursday, 5 July 2012

A Portable Garbage - A Tutorial


Warning: This tutorial is pic-heavy and intended for sewers with basic knowledge of sewing  (ex: right side to right side, basic seams, sewing on a curve) because there are some tricky parts.
Attention: Ce tutoriel contient beaucoup de photos et est destiné à des gens qui ont une bonne connaissance de base de la couture (ex: endroit sur endroit, coutures de base, coudre une courbe) car il y a des étapes un peu plus difficiles.


There are a lot of very beginner tuorials on the net.  You might find it useful to check them out before trying this project.
Il existe des tonnes de tutoriels pour les débutants sur l'internet.  Vous trouverez probablement utiles de les consulter avant d'entreprendre ce projet.
-------------------------------
Hi again !
Salut encore !

I just finished a really cool (at least I think so ;) project.  When I watch TV, I use a lot of kleenex and I don't like a garbage pail in my living room.  So I thought of making a portable fabric garbage bag that I could bring with me wherever I like.  I always like to use things I would usually throw away so I looked around and found this:
Je viens de terminer un projet super (en tous cas moi je trouve ;).  Quand je regarde la TV, j'utilise beaucoup de mouchoirs et je n'aime pas avoir une poubelle dans le salon.  J'ai donc pensé me faire une mini-poubelle de tissu, portative, que je pourrais apporter avec moi où je veux.  J'aime toujours utiliser des choses que je jetterais alors j'ai regardé autour et j'ai trouvé ça:


So what is it ?  This !  I am a sucker for Moccachino frozen yogurt and I eat a TON !!!
Mais qu'est-ce ?  Le couvercle de mon yogourt glacé préféré: moccachino.  Et j'en mange une tonne!


I inspired myself from the Clip'N Go and I went a-cutting with my trusty X-acto knife:
Je me suis inspirée du Clip'N Go et j'ai commencé à couper le couvercle avec mon exacto:


And I ended up with this:
Voici le résultat:


Is it starting to ring a bell for what I am going to make ?  This is what I will need: (I also used an aligator clip, mat scotch tape and some paper clips):
Est-ce que ça commence à prendre forme ?  Voici ce dont j'ai besoin (aussi une pince alligator, du ruban gommé mat et des trombones):


I am going to make a fancy fabric garbage bag lined with vinyl (from the shower curtain).
Je vais faire un sac de poubelle de tissu fancy, doublé avec du vinyle (du rideau de douche).

Let's get started:
On y va:

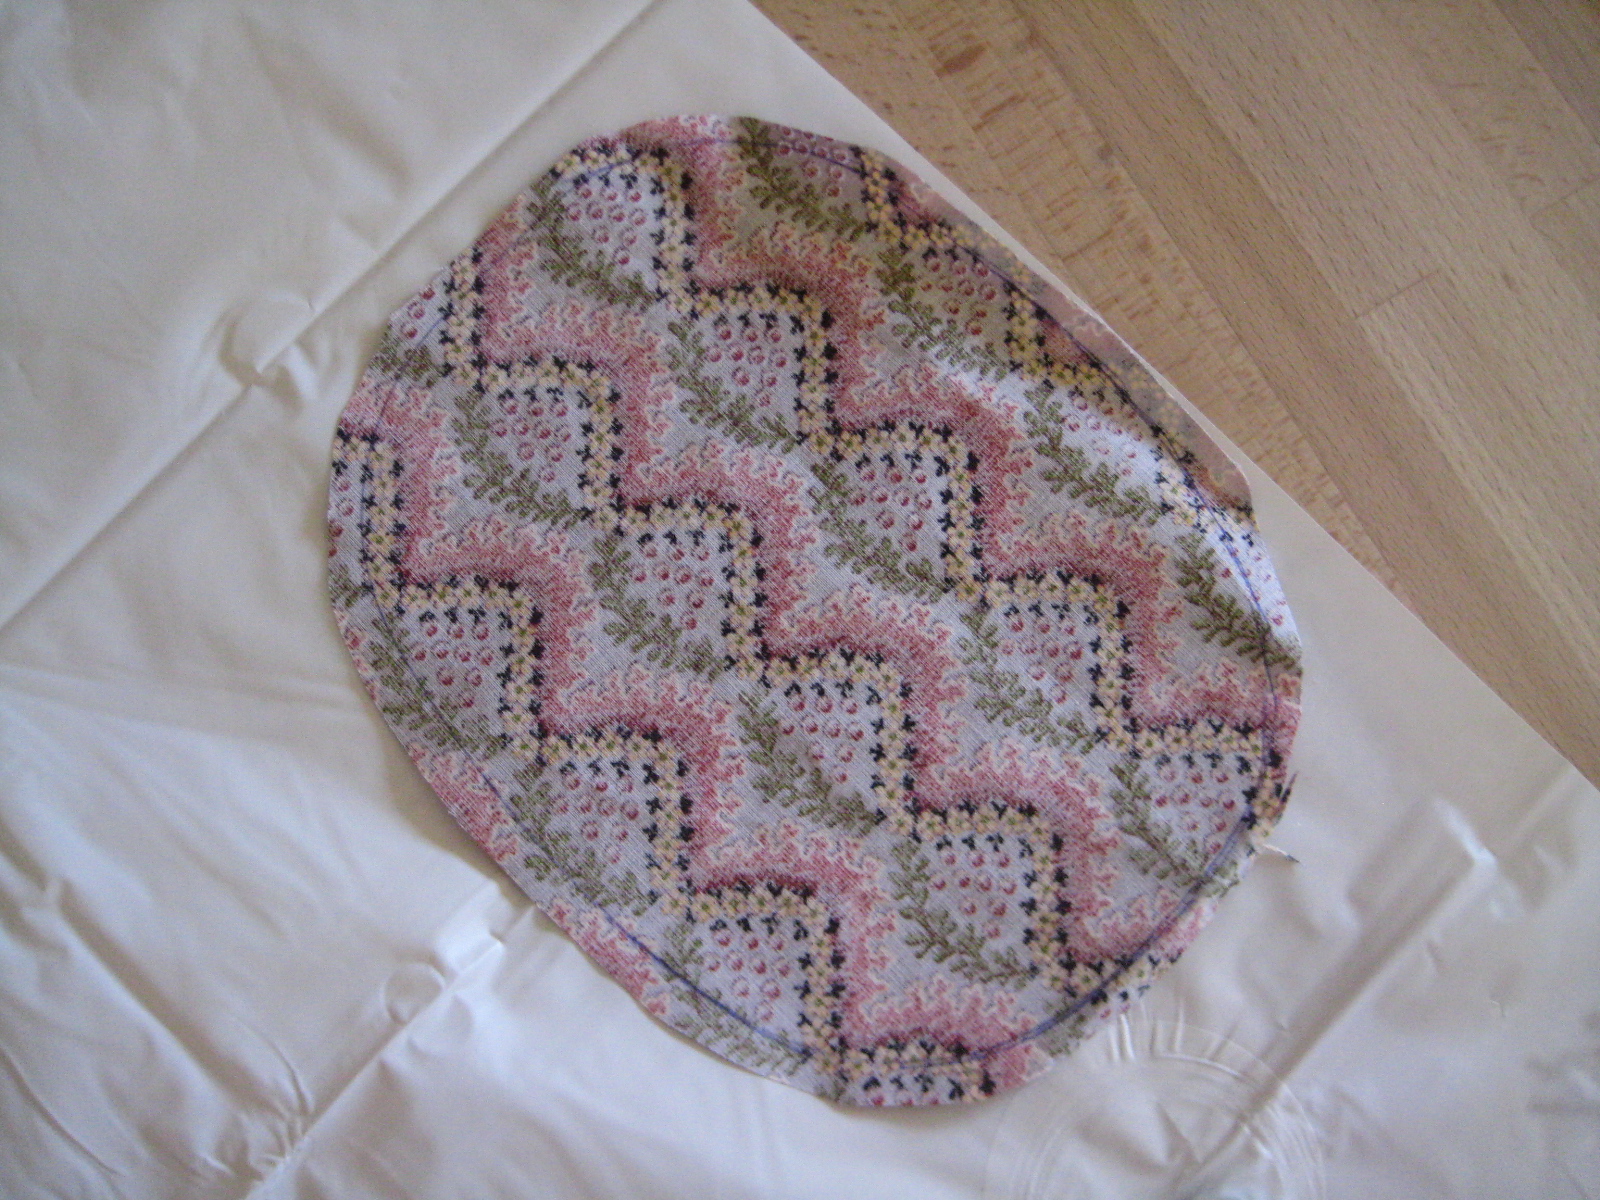
First, you need to measure the lid's circonference.  Mine measured 53 cm so I added a 2 cm seam allowance.  I wanted my bag to be about 25 cm height.  So I cut a 55 cm x 25 cm fabric piece. Then I traced the lid on the fabric.
Premièrement, vous devez mesurer la circonférence du couvercle.  Le mien mesurait 53 cm donc j'ai ajouté 2 cm d'allocation de couture.  Je voulais mon sac d'environ 25 cm de profondeur.  J'ai donc coupé un morceau de 55 cm x 25 cm.  J'ai ensuite tracé le couvercle sur le tissu:


After tracing, I cut it, adding a 1 cm seam allowance.
When I had my fabric pieces, I proceeded to cut the vinyl.
Après avoir tracé, j'ai coupé le tissu, en ajoutant 1 cm d'allocation de couture.
Quand j'ai eu mes pièces de tissu, j'ai coupé mon vinyle.


And I found a bonus: magnets !  Et un bonus: des aimants !


Of course, I needed a loop.  I used the same measurements as the Clip'N Go.

So here are all the pieces I need: 2 main pieces (fabric and vinyl), two bottoms (fabric and vinyl), one faric loop, one D-ring and one lid ring.

Évidemment, j'avais besoin d'un anneau.  J'ai utilisé les mêmes dimensions que le Clip'N Go.


Alors voici les pièces requises: 2 pièces principales (tissu et vinyle), deux fonds (tissu et vinyle), un anneau de tissu, un anneau en D, un anneau de couvercle.


First, let's make the loop, the tradional way (see Clip'N Go instructions):
J'ai suivi les instructions du Clip'N Go pour l'anneau de tissu:


Then, I started with the outer fabric.  I first remeasured to find out how much I needed to sew:
Ensuite, j'ai commencé par le tissu extérieur.  J'ai premièrement re-mesuré pour être certaine que j'avais les bonnes dimensions:


Overlapping the two edges, I measured the distance between them and divided by two:
3 cm divided by 2 = 1,5 cm seam allowance.  
So I sewed it down the height to make a tube with a 1,5 cm seam allowance.
J'ai fait chevaucher les deux bouts autour du couvercle et j'ai mesuré la distance entre les deux bords et divisé par 2:    
    3 cm divisé par 2 = 1,5 cm d'allocation de couture.  
J'ai donc cousu la pièce principale en tube, à 1,5 cm.

Then came the vinyl.  Now, if you have never sewn with vinyl before, it can be tricky because it tends to stick to metal.  BUT, this neat trick works wonderfully well: just use mat scotch tape under the presser foot.  As long as you sew with the vinyl on top, you're OK.  Don't forget to pierce the holes in the scotch tape to let the thread and needle in !
Ensuite vient le vinyle.  Si vous n'avez jamais cousu du vinyle, ça peut devenir difficile.  MAIS  ce petit truc fonctionne à merveille: utiliser du ruban gommé mat sous le pied de machine.  Tant que le vinyle est au-dessus, c'est bien.  Ne pas oublier de percer les trous dans le ruban gommé pour laisser passer le fil et l'aiguille. 


Another thing you have to watch out for is your stitch length.  You need to use the largest stitch length and NOT go back to lock your stitches.  You need to knot it by hand:
Une autre chose à vérifier: la longueur du point.  Vous devez utiliser le point le plus long et ne pas reculer pour bloquer les coutures.  Il faut faire un noeud à la main.


Last thing, you can't use pins.  You have to use paper clips:
Dernière chose: vous ne pouvez pas utiliser des épingles.  Vous devez utiliser des trombones.


So after I sewed down the main piece of vinyl into a tube, I sewed the fabric to the vinyl.  (It is different from the Clip'N Go instructions but it seemed to me a better way to go because of the flimsy vinyl).  I put the two tubes right side to right side, the vinyl inside and went sewing.  BUT don't forget (I forgot...) to insert the loop between the two layers, ring side towards the bottom.   Of course, you don't use pins in this step either...
Alors, après avoir cousu le tube de vinyle, j'ai cousu les deux tubes ensemble.  (C'est différent que le Clip'N Go mais je croyais que c'était la meilleure façon à cause du mince vinyle).  J'ai mis les deux tubes endroit contre endroit, vinyle en dedans, et j'ai cousu.  MAIS ne pas oublier (j'ai oublié..) d'insérer l'anneau de tissu entre les deux tubes avec l'anneau D vers le bas.  Évidemment, on n'utilise pas d'épingles dans cette étape non plus...


Once your two tubes are sewn together, turn them inside out and insert the lid-ring.  Fold in two,  fabric side over the lid-ring.  Topstitch the bottom of the lid, vinyl side to your presser foot.  This part was tricky because of the shape.  I have done circle shapes before and they are way easier.  Fortunately, the lid ring plastic is somewhat flexible.  Make sure you place your needle to the far right possible to minimize the gap.  You could also use a zipper foot (probably better) but I was lazy and just used my regular presser foot (this picture is taken after the fact, obviously...).  And just be careful to NOT sew the lid.  Would not be good for your needle...  If you place your foot to the lid, everything should be OK.
Une fois que les deux tubes sont cousus ensemble, retournez-les à l'envers et insérer le couvercle-anneau autour.  Plier le tissu à l'extérieur sur le couvercle-anneau.  Coudre le couvercle-anneau en place avec le côté vinyle vers le pied machine.  Cette étape était une peu difficile à cause de la forme.  J'ai cousu plusieurs cercles et ils sont plus faciles.  Heureusement, le couvercle est fait de plastique un peu flexible.  Assurez-vous de placer votre aiguille à droite complètement pour minimiser l'écart.  Vous pourriez probablement utiliser le pied à fermeture éclair (probablement mieux) mais j'étais trop paresseuse et j'ai utilisé mon pied ordinaire (cette photo est prise après la couture, bien sûr...).  Et faites attention de ne pas coudre le couvercle.  Serait pas bon pour l'aiguille...  Si vous appuyez votre pied sur le couvercle, vous devriez réussir.


When that step is done, notch your fabric bottom at every quarter and your tube as well.
Lorsque cette étape est faite, marquez votre fond de tissu aux 4 quarts, ainsi que votre tube.


Then, sew the oval to the fabric tube, right side to right side, using the notches (this tutorial gives a good description of this).  It is also tricky.  Go slow, and, keeping your needle in the fabric while releasing your presser foot, adjust your fabric every cm or so, especially around the curves.  You'll get it I'm sure, and even if you get some puckering, it is the underside of a garbage bag for Heaven's sake !
Maintenant, coudre le fond au tube de tissu, endroit contre endroit, en utilisant les marques (ce tutoriel donne une bonne description).  C'est aussi un peu difficile.  Allez lentement, et en gardant votre aiguille dans le tissu et en relevant votre pied, réajustez le tissu à tous les cm environ, surtout dans les courbes.  Vous réussirez, j'en suis certaine, et même si ça plisse un peu, c'est le dessous d'un sac de déchets !!!

Once the fabric oval is sewn, turn it inside in and do the same for the vinyl.  Of course, the seam in the vinyl will be showing, but it is inside...  I prefered this method versus the traditional method of leaving an opening and turning through it and whipstitching the opening, because of the vinyl.  Don't forget to use paper clips.
Une fois le fond de tissu cousu, retournez-le à l'endroit et faire la même couture pour le tube de vinyle.  Évidemment, la couture du vinyle sera visible mais elle est en dedans...  Je préfère cette méthode à la méthode traditionnelle de garder une petite ouverture et tourner par cette ouverture et coudre à la main cette ouverture, à cause du vinyle.  Ne pas oublier d'utiliser des trombones.


A little wonky but I think it looks OK.  Un peu croche mais c'est correct.


Of course, clean up the edge.  No need to notch this.
Évidemment, couper les bords plus propres.  Pas besoin de cranter les courbes.


Turn it the right way and insert an aligator clip in the D-ring:
Retourner de la bonne façon et insérer une pince alligator dans l'anneau en D:


And then, you are ready to clip it wherever you want.  You can use another type of clip.   The D-ring makes it easy to change.  I am so happy with my cute and CHEAP kleenex garbage bag which stays open:
Et maintenant, vous êtes prêt à l'installer où vous voulez.  On peut aussi utiliser un autre type de pince.  L'anneau en D rend le changement plus facile.  Je suis très heureuse de mon joli sac de déchets qui ne m'a pas coûté cher et qui reste ouvert:


Hope you enjoyed it and if you make something similar, I'd love to see pictures !
J'espère que vous avez aimé et si vous faites quelque chose de semblable, j'aimerais bien voir des photos !

If you have questions, don't hesitate to contact me !
Si vous avez des questions, n'hésitez pas à communiquer avec moi !

Peace

Claudia